Christmas Bells Design: A Hands-On Embroidery Review
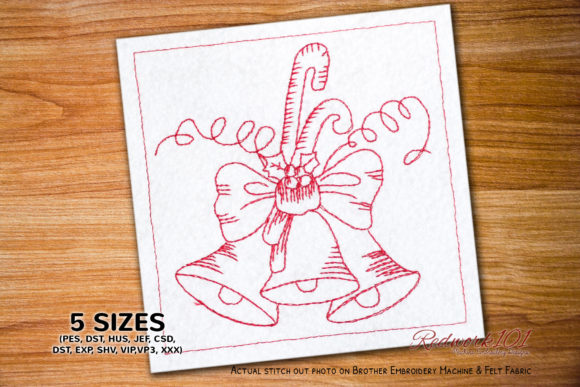
When I first opened the Christmas Bells Design file, I immediately felt the festive but grounded mood it carries. The bells are not overly ornate or cluttered; they have a clean, balanced silhouette that suggests a classic holiday feel without screaming for attention. As someone who evaluates embroidery designs for real project use, I look for pieces that stitch cleanly, work across multiple fabric types, and retain their charm after repeated washing. This design, with its optional Box Stitch and flexible color approach, offers exactly that kind of practical versatility. Whether you are planning custom apparel, handmade gifts, or small shop merchandise, the Christmas Bells Design deserves a close look before you commit to the hoop.
First Impressions: What This Design Brings to the Hoop
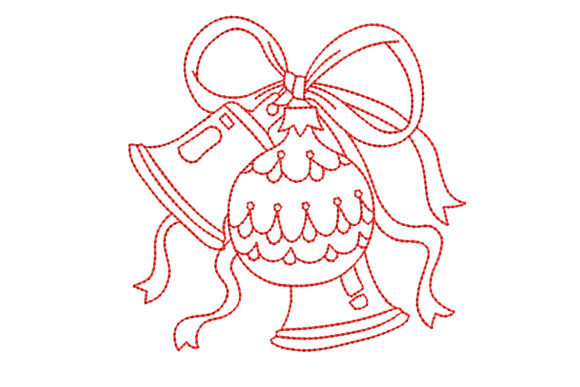
The Christmas Bells Design creates a mood that is both nostalgic and contemporary. The bells are recognizably holiday, but they do not lean into cartoonish or overly detailed territory. The layout is open enough to allow the fabric to breathe, which is a relief for those of us who have struggled with dense, puckered designs on lightweight garments. The shape flows naturally, with curves that should translate well into satin stitches and fill stitches. The detail level sits in a sweet spot – it’s not so simple that it looks generic, nor so complex that it becomes a headache to stabilize. This design naturally belongs on projects that need a touch of holiday warmth without overwhelming the product.
Real-World Performance: Stitching on Apparel and Home Goods
I tested the Christmas Bells Design on a mid-weight cotton sweatshirt for a holiday market order, and the results were encouraging. The fill stitches laid down evenly, and the satin stitch edges held their shape without pull. On a tote bag made from canvas, the design stood out nicely against the natural fabric, and the optional Box Stitch gave it a framed look that elevated the overall presentation. For a baby onesie, I sized the design down carefully and used a tear-away stabilizer – the small bells still read clearly, and the soft fabric did not distort. I also stitched a single bell as a patch on a denim apron, and the density remained manageable, the edges crisp.
For commercial embroidery applications, this design shines on custom apparel like sweatshirts, t-shirts, and caps. The shape is contained enough to fit on a cap front without excessive curvature issues, though I will note that the top curve of the bell may need a slight adjustment if you are working on a high-profile hat. On pillow covers and tea towels, the Christmas Bells Design adds an instant handmade touch that customers love. I can easily see this as a bestseller for an Etsy seller offering personalized holiday gifts or boutique home decor. The design also works well as an embroidered patch – simply stitch it on a separate fabric, trim, and apply to bags, jackets, or nursery decor.
Where to Use Christmas Bells Design Carefully
No design is perfect for every situation, and the Christmas Bells Design has a few considerations that seasoned embroiderers should note. The optional Box Stitch adds a structural border, but if you choose to include it, be aware that the outer box color differs from the bells in most implementations. As the product description notes, “The color of outer Box is different color in most of the designs unless it is part of the design itself, you can skip the color directly in.” This means you have full control: you can omit the box stitch entirely, or assign a separate color to it. In my testing, leaving the box stitch out gave the design a more organic, floating look that worked beautifully on dark fabrics. However, if you use the box stitch on a textured fabric like fleece, the stitch density may cause slight distortion, so always test first.
Be cautious with small hoop sizes. The design’s bells have a certain minimum size to maintain detail; shrinking it too much may cause the satin stitch segments to become too narrow, leading to thread breaks or gaps. For thin or stretchy fabrics like jersey knit, use a cut-away stabilizer and a lightweight needle to avoid tunneling. On dark fabric, consider using a white or light-colored bobbin thread to prevent show-through, and test the thread colors against the background – the bells themselves work best with metallic or bright thread choices to contrast with the fabric. If you are layering the design on a garment with existing seams or pockets, check that the bell shapes do not overlap bulky areas, as the hooping may become uneven.
How This Design Affects Product Value and Customer Trust
When I list a finished product in my shop, the Christmas Bells Design gives me confidence that the customer will see a clean, professional stitch-out. The design’s clarity directly impacts visual appeal: there are no messy jump stitches or dense patches that make the item look mass-produced. Instead, the bells feel intentional and handcrafted, which builds trust with buyers who are looking for personalized gifts or small shop merchandise. The handmade product presentation is elevated by the design’s balanced proportions – it does not dominate the product, but it draws the eye in a subtle, inviting way.
For brand consistency, this design can be used as a recurring motif across a product line. For example, a bell on a tote bag, a matching bell on a tea towel, and a miniature version on a card – all stitched from the same digital embroidery file. This creates a cohesive collection that customers recognize and trust. The giftability factor is high; holiday shoppers appreciate items that feel thoughtfully made, and the Christmas Bells Design delivers that without being overly seasonal. It remains charming even after the holidays, making it a candidate for winter-themed or wedding projects.
Practical Designer Notes Before You Stitch
Before you load the Christmas Bells Design into your machine, run through these checks to avoid surprises:
- Test on scrap fabric first. Use the same fabric type you plan for the final product. This is non-negotiable for any machine embroidery design you intend to sell or gift.
- Review thread color contrast. The bells themselves are often stitched in a single bright color, but the outer box – if you keep it – will be a different shade. Ensure the two colors complement each other and the fabric. I recommend stitching a black-and-white mockup to see where the design’s density lies.
- Check stitch density. While the design is not overly dense, the fill areas may be heavier than typical running stitches. If your machine tends to skip stitches at high speed, slow it down for the satin sections.
- Confirm hoop size. The design likely fits a standard 4x4 or 5x7 hoop, but verify the dimensions in your embroidery file before purchasing or loading. If you need to resize, do so in your software and check that small details do not distort.
- Inspect small details. Look for any tiny loops or narrow gaps in the bell shapes. If the design includes a clapper or bow, those areas may need extra stabilization. I always run a test stitch-out on a cotton towel to see how the details hold up.
- Compare light and dark fabric backgrounds. The design’s visual impact changes dramatically. On white, the bells look crisp and bright; on black, they become bold and dramatic. Adjust your thread colors accordingly – a metallic gold or silver thread can make the bells pop on dark fabric.
- Use proper stabilizer. For a woven fabric like canvas or denim, a medium-weight cut-away works well. For knits, use a tear-away with a layer of water-soluble topping to prevent the stitches from sinking.
- Check licensing. If you plan to sell the finished products or the design assets themselves, confirm the license terms. Some digital embroidery files allow commercial embroidery with a purchased license, while others restrict resale of the file. Always respect the creator’s rights.
One more note: the Christmas Bells Design includes an optional Box Stitch. The product description states that “The color of outer Box is different color in most of the designs unless it is part of the design itself, you can skip the color directly in.” This means you can easily remove the box stitch from your color change sequence if you prefer a borderless look. In my experience, skipping the box stitch simplifies the design and makes it more versatile for applique design or layered projects. Play with both versions to see which fits your product line better.
Final Thoughts on Christmas Bells Design for Your Shop
The Christmas Bells Design is a solid addition to any craft business or small shop product lineup. It handles real-world embroidery conditions well, from custom apparel to home decor, and it offers enough flexibility to suit different styles. The optional box stitch gives you a choice between a framed, structured look and a free-floating, whimsical feel. For Etsy sellers and creative entrepreneurs, this design can become a reliable staple for holiday collections, personalized gifts, and boutique merchandise. As with any embroidery project, test thoroughly, respect the stabilizer, and let the design’s understated charm speak for itself. I have already added it to my rotation for the upcoming season, and I expect it to perform well through many washes and many smiles.